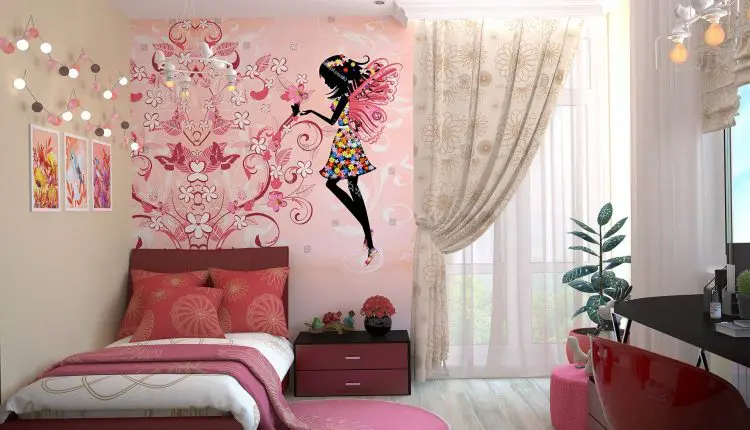
A room fit for a princess or prince!
Today’s paid guest post article comes from Lara Douglas from Neon Signs Depot who shares some great information about designing a kids’ room from start to finish.
This is one of my best memories during the period of time from when my wife told me she was pregnant to the birth of my child, the all-important “nesting” period. In fact, I wrote an article about the design for my son’s room.
My other two children are girls and for each of them we went with a pink ballerina theme in one room and a lavender and white theme in my youngest daughter’s room.
Before designing these rooms here in Reno, Nevada, when my wife and I lived in the Washington, DC metropolitan area, we had a light pink and sea-foam green paint color scheme with a white stripe in the middle of the wall to separate the two colors with a vinyl cling message that was on her wall that read, “You are my Sunshine” and in my son’s room, we had a Red Sox red and blue color with a vinyl wall decal that was a road sign of how far away baseball stadiums were from our home (Fenway Park and Nationals Stadium).
It broke my heart to paint them back to white before moving back home, here to Reno, but we do still have pictures that I fondly look at from time-to-time.
Designing a child’s room is as much for the parent as it is for the child while they are still young, but there are also times when the child grows out of the nursery colors and furniture to their own tastes and wants. Below are some great tips on that period when your child wants to give their room a makeover. We hope you enjoy reading it as much as we did.
Thanks for the great article, Lara.
Enjoy.
– Will
Advertisement

Designing a Kids’ Room from Start to Finish: How to Do It Like A Pro
If you have kids, you can’t avoid the inevitable forever: designing a bedroom for them that meets all their needs, stores all their stuff, and gives them space to do what they enjoy. Babies’ rooms are easy – paint the walls light blue or pink, grab a crib, some stuffed animals, and make room for lots of diapers! Kids, however, are a lot more complicated when it comes to their interior design needs because they want a say!
While kids aren’t the toughest audience to impress, there are some easy ways to avoid a design disaster. This is how to design a kid’s room like an absolute pro – from start to finish.
-
Choose carpet or hardwood.
This choice may haunt you forever, so be careful. While most bedrooms have carpet floors, especially for kids to prevent slips, opting for a hardwood finish may save you a lot of time and stress in the long run. Hardwood floors hold less dust mites than carpet when it comes allergy season and are exponentially easier to clean. Instead of scrubbing a carpet floor with a brush (knowing you’ll never really get the mud stain out,) you can mop and go without leaving a trace. -
Paint the walls.
If your kids are old enough, let them pick the wall color to showcase their creativity, style, and make them proud to call their bedroom home. While dark colors like dark grey and deep blue should perhaps be avoided as to not risk making the room appear smaller, any other color can be a go, as long as you and your tot agree. -
Set up furniture before decorations.
You don’t want to be moving furniture to accommodate the placement of a picture frame, so opt for moving beds, chairs, desks, couches, etc…in first. Beds should be in a place where natural light can shine in and wake your child naturally. Desks should also be in a place easily accessible to light. Ask your child where he or she wants her furniture, as some kids would rather not have their bed near the scary-at-night-closet. -
Decide on a bedspread.
Once the furniture is set up, decide on a bedspread that accents the walls. Usually, you can decorate in a three-step method color-wise: pick a wall color, pick bedspread that has a color in it that matches walls, then make the other accent colors of the bedroom whatever remaining colors there are on the bedspread. This will make the room look cohesive and well-planned, even though implementing it is super easy! -
Find décor that matches your bedspread’s accent colors.
This is where you can really get creative with a child’s bedroom and make it all their own. While pictures of friends and family can easily adorn the walls for a cute look, opt for some unique decorations, too, like one of these custom neon signs for kids. Let your kids have a say in this part of the process, as they probably have some unique ideas of their own that they’d like to see brought to life in their bedroom. -
Make sure the room is functional.
While having completely clear floors may fit your dream aesthetic, it may not fit a child’s bedroom. Having bins and cubes throughout the room for toy storage is a must, or these items will simply end up all over the floor. Find cute storage bins from your local home stores that match the room’s accent colors, and they will fit in seamlessly while adding functional storage. Likewise, if your child needs a stepping stool to reach his or her bed or top shelves, provide one that matches the room and is always easily accessible for him or her to help her gain independence. -
Get the thumbs-up from your kid when you’re done.
Once all is said and done, getting the approval of your child is a must, so you know they are happy with their space. Asking them questions like this will also reinforce to them that their opinion matters, and that you value their input when it comes to big decisions that affect them. If there is anything (within reason) they’d like to change, go ahead and work with them to do it. Encourage them to keep adding to the room throughout the upcoming months with artwork to hang on the walls, DIY storage, etc… to encourage creativity and help them feel that the space is truly theirs.

Implement these strategies the next time it’s time to design a child’s bedroom, and you can’t fail. After all, a child’s room is all about possibility, experiences, and FUN! Make this experience a fun one with your kid and the room will show it.
Comment down below with your tips and tricks for designing a child’s room, along with which of these strategies you’re excited to implement in your own home!

